Automating File Artifact Enrichment in Splunk SOAR

Overview
File classification presents a significant challenge for security analysts Typically, the standard data provided in a Splunk SOAR artifact - such as file hashes or names - isn't enough to definitively identify malicious files. It's akin to trying to judge the contents of a package by its label alone.
This is where smart automation becomes crucial. Implementing systems to automatically enrich file artifacts isn't just a nice-to-have; it's essential for enabling Security Operations Centers (SOCs) to quickly triage file-based alerts and address potential malware incidents before they escalate into full-blown ransomware attacks.
This post will cover the key components involved in file artifact enrichment and guide you through building a basic Splunk SOAR playbook to automate that process. By the end, you'll have a clear roadmap for enhancing your security posture through intelligent file analysis automation.
Enrichment - Key Components
When adding enrichment to the triage process, the typical first step is to provide analysts with a simple classification status that says if the file is malicious or benign. However, there is a lot more information that can be obtained that could be used to further detect malicious activity! Here's just some of the possibilities:
- Network indicators: malware will often call out to network locations such as IP addresses or domain names.
- Dropped file hashes: some malware will download other modules, or the malware may be an archive containing additional malware files.
- Associated threats: malware can be traced back to specific threat actors or families.
ReversingLabs apps for Splunk SOAR make this wealth of information readily accessible to analysts. When implemented within a well-designed playbook, these apps deliver rapid and accurate insights, significantly enhancing the speed and effectiveness of the triage process. This comprehensive approach allows security teams to:
- Quickly assess the severity and scope of potential threats
- Identify relationships between seemingly disparate indicators
- Prioritize response actions based on a more complete threat picture
- Proactively hunt for related malicious activity within the environment
In the next section, we'll walk through the step-by-step process of constructing a simple file enrichment playbook in Splunk SOAR, incorporating ReversingLabs apps to harness the full potential of file threat intelligence.
Automating File Enrichment with Splunk SOAR
When building playbooks in Splunk SOAR, it's always good to start with a design methodology. Splunk has created the I2A2 acronym, which stands for Inputs, Interactions, Actions, and Artifacts.
- Inputs: the data sources that trigger and feed into the playbook.
- Interactions: third party services that the playbook interacts with.
- Actions: the specific automated tasks performed to process inputs and interact with external services.
- Artifacts: the outputs and results generated by the playbook.
For a basic file enrichment playbook, here's what an I2A2 design looks like:
| Inputs | FileHash, Hostname, FileName |
|---|---|
| Interactions | ReversingLabs Spectra Intelligence, ReversingLabs Spectra Analyze |
| Actions | Get File Hash Reputation, Detonate File, Get File Report |
| Artifacts | FileHash |
First Steps - Reputation Lookup
To get started creating a basic file artifact enrichment playbook, it's a good
idea to start by filtering for only the inputs that the playbook should work with.
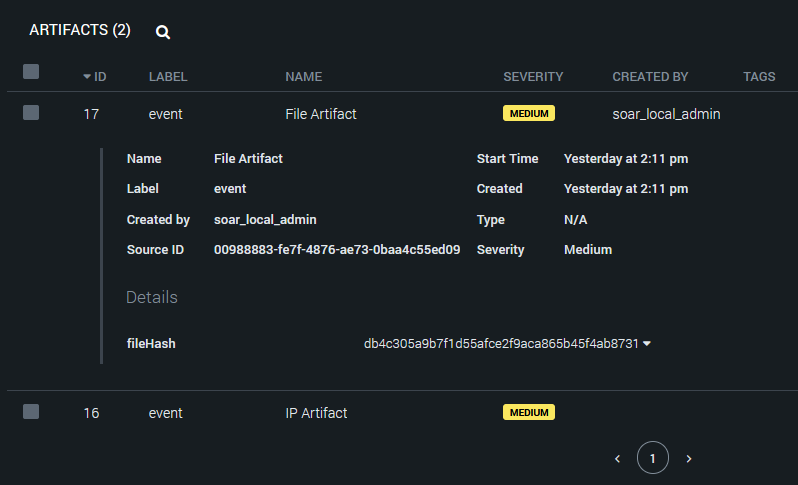
This will require an understanding of how artifacts are being created in Splunk
SOAR. For example, artifacts generated for this event use the fileHash CEF field:
Place a filter block and connect the Start block. For the condition parameter,
set the value to artifact:*.cef.fileHash, the operator to !=, and leave the
match value empty. This will ensure that only artifacts with the fileHash CEF
field continue past this point:

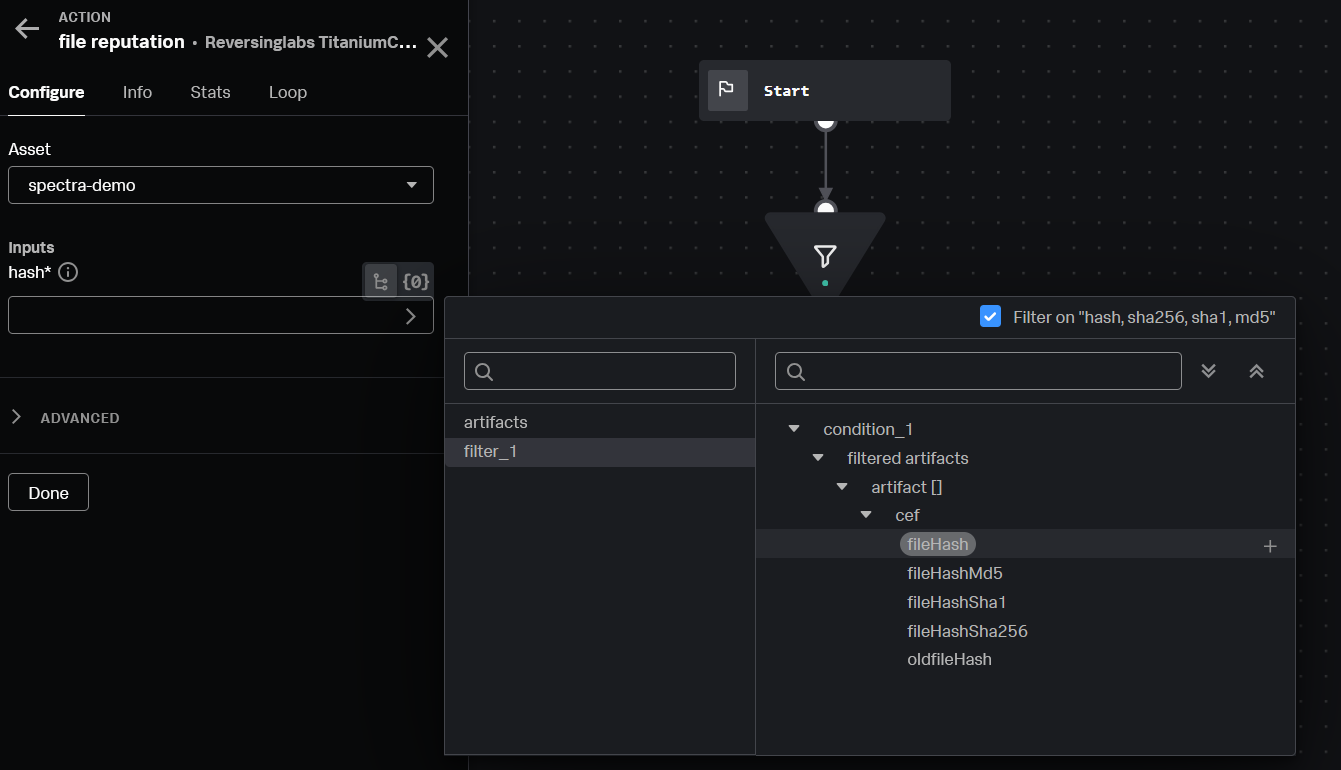
Now that the playbook will only process file hashes, it's time to start adding actions and interactions. A common action is to get the reputation of the file hash. Using the ReversingLabs TitaniumCloud v2 app for Splunk SOAR makes this easy.
- Add an action block and connect to the filter block.
- Select the ReversingLabs TitaniumCloud v2 app.
- Select "file reputation" from the list of actions.
- In the hash input, select the
fileHashCEF field from the previous filter action:
Congratulations! You've built your first file enrichment automation playbook. However, what happens if the third party service hasn't seen this file before?
Adding Functionality - File Upload and Detonation
To further extend the capabilities of this playbook, adding an action to upload and detonate unknown files can be a game changer. For the ReversingLabs TitaniumCloud v2 app, the process to upload and detonate a file can be summarized in the following steps:
- Upload the file
- Submit for static and/or dynamic analysis
- Retrieve the analysis report
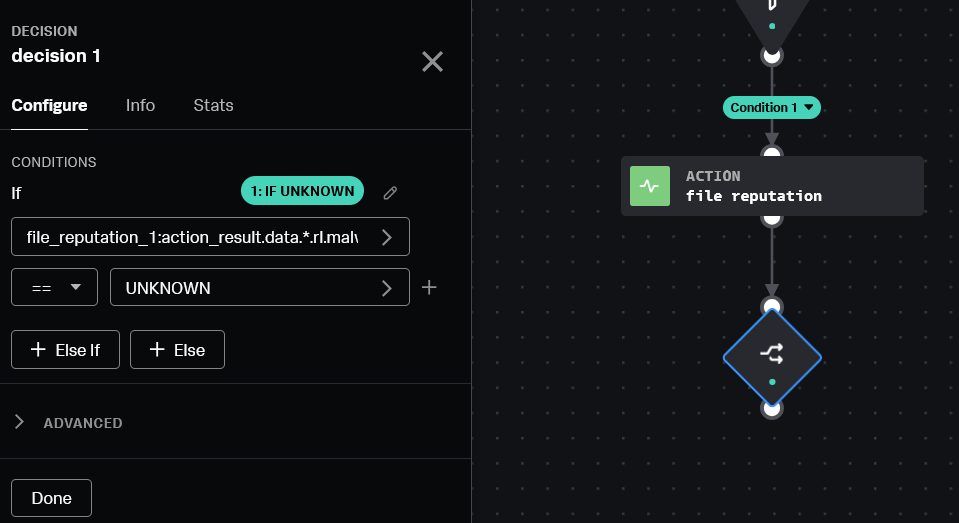
Start by adding a decision block, and connect it to the file reputation action.
The value for the parameter should be file_reputation_1:action_result.data.*.rl.malware_presence.status,
the operator set to ==, and the matching value should be UNKNOWN:
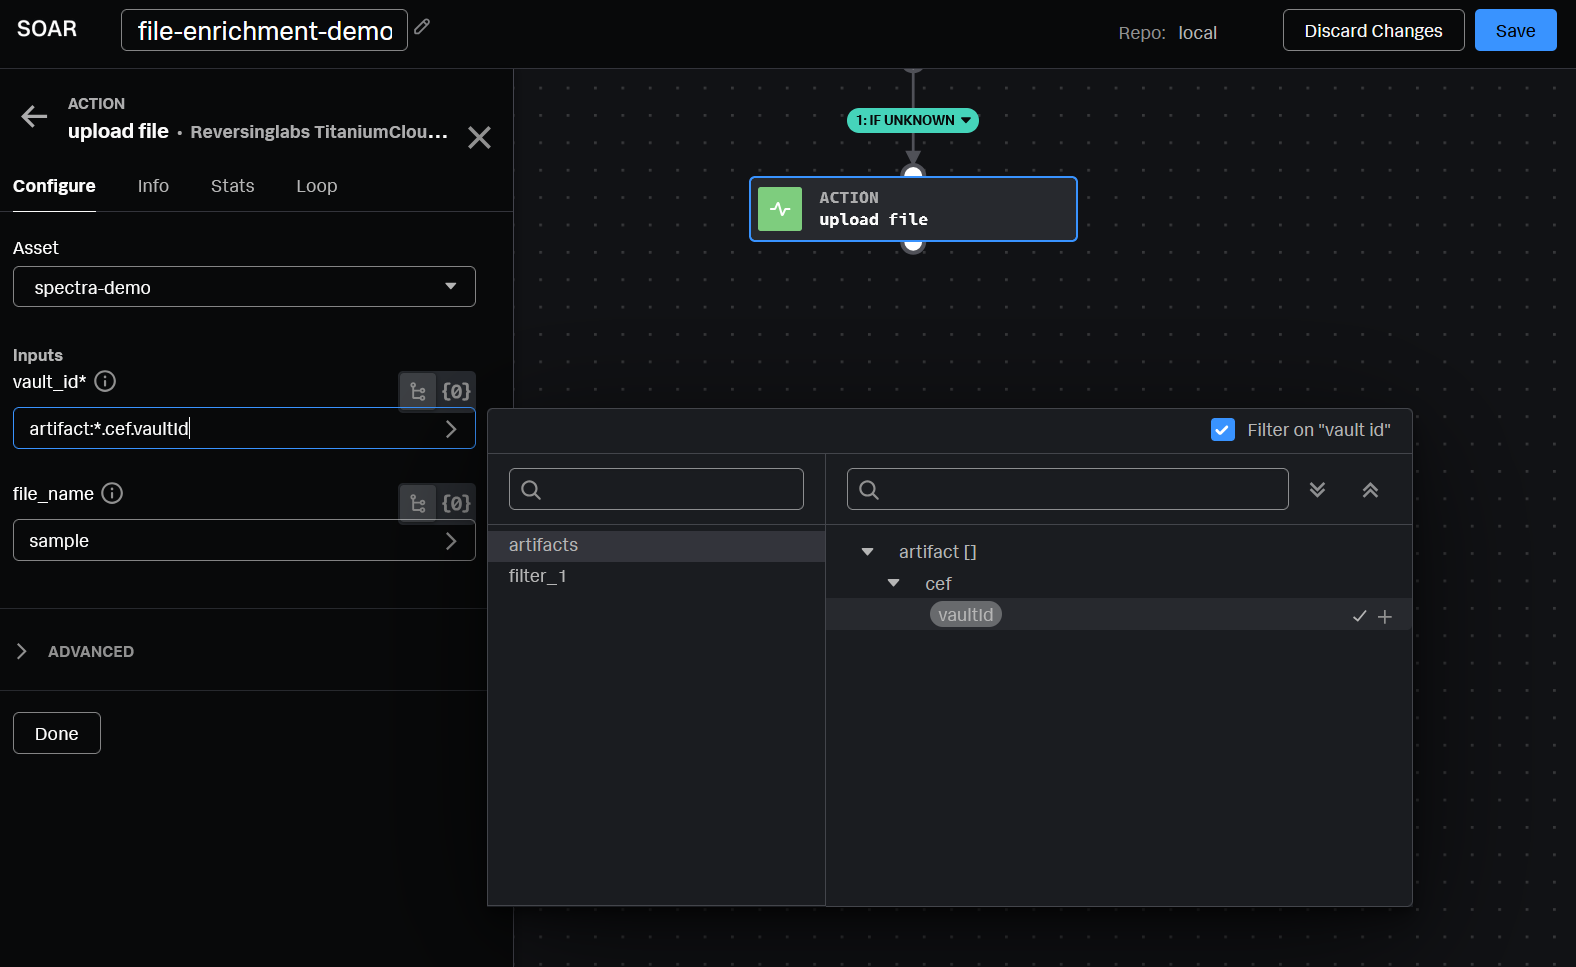
Next, connect the decision block to a new action block. This time, select the
"upload file" action from the ReversingLabs TitaniumCloud v2 app. Set the vault_id
input parameter to the artifacts vaultId CEF field, or artifact:*.cef.vaultId:
Ensure that the file has been uploaded to the container's file vault, otherwise the playbook will not be able to continue!
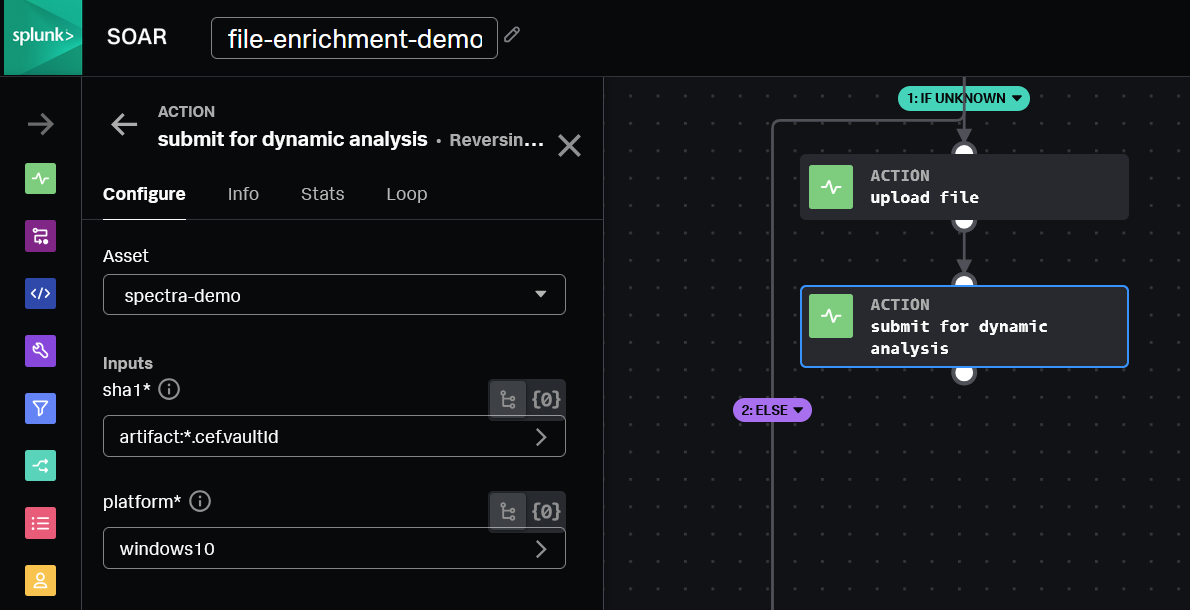
After the file has been uploaded, add another action block to submit the sample for detonation by selecting the "submit for dynamic analysis" action. Set the sha1 input as the vaultId value:
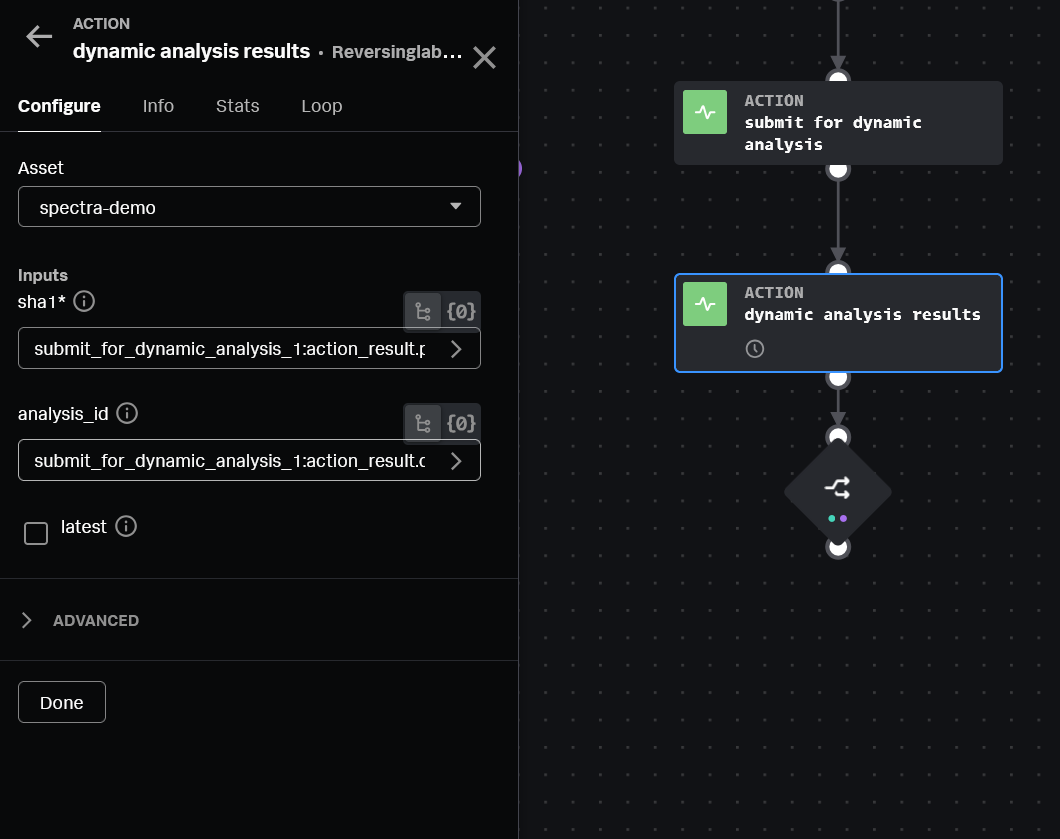
Finally, add another action block and select the "dynamic analysis results" action.
The sha1 input value can be set to submit_for_dynamic_analysis_1:action_result.parameter.sha1,
and the analysis_id value should be set to submit_for_dynamic_analysis_1:action_result.data.*.rl.analysis_id:
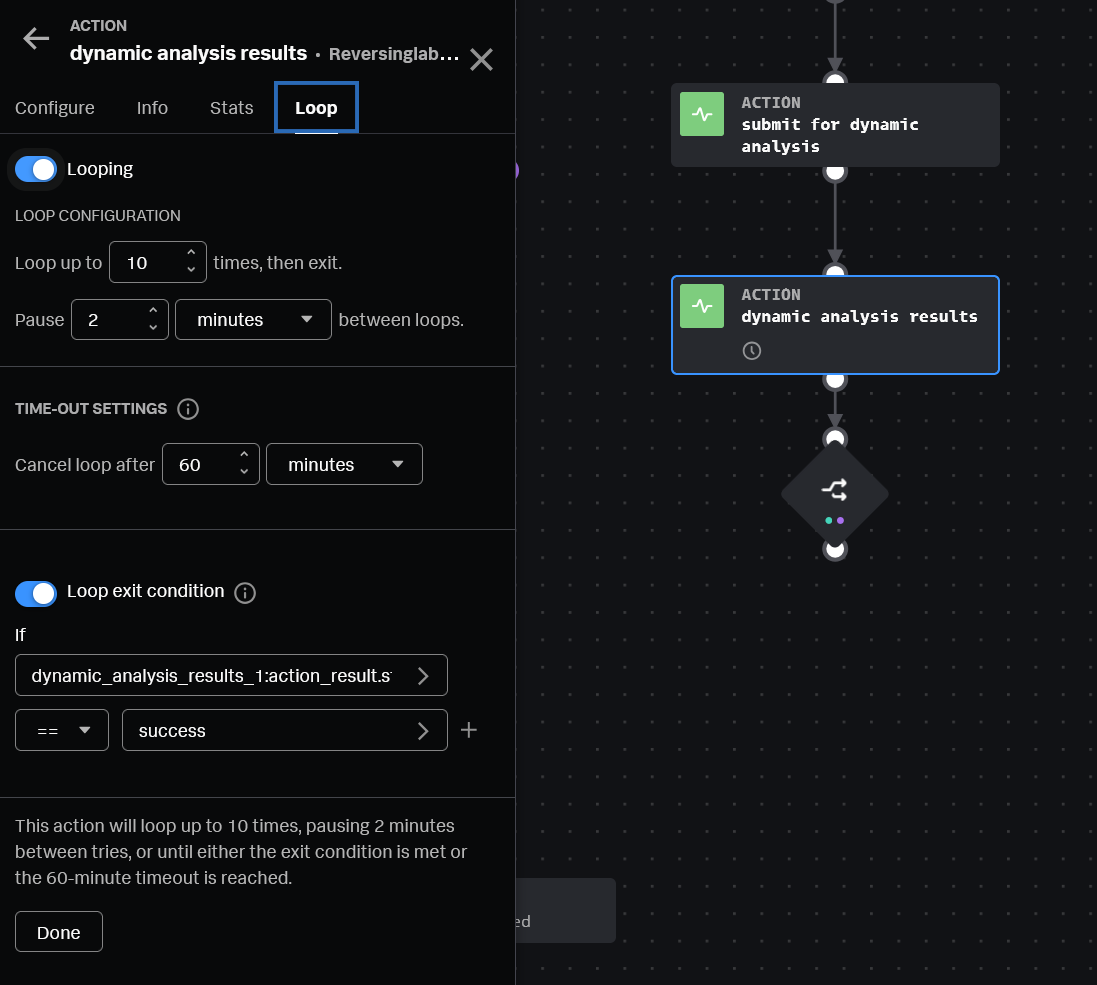
A key point to know here is that dynamic analysis can take several minutes to
complete, so it's important to configure a loop until the analysis is completed.
Configure an acceptable number of retries, and ensure the exit condition value is
set to dynamic_analysis_results_1:action_result.status:
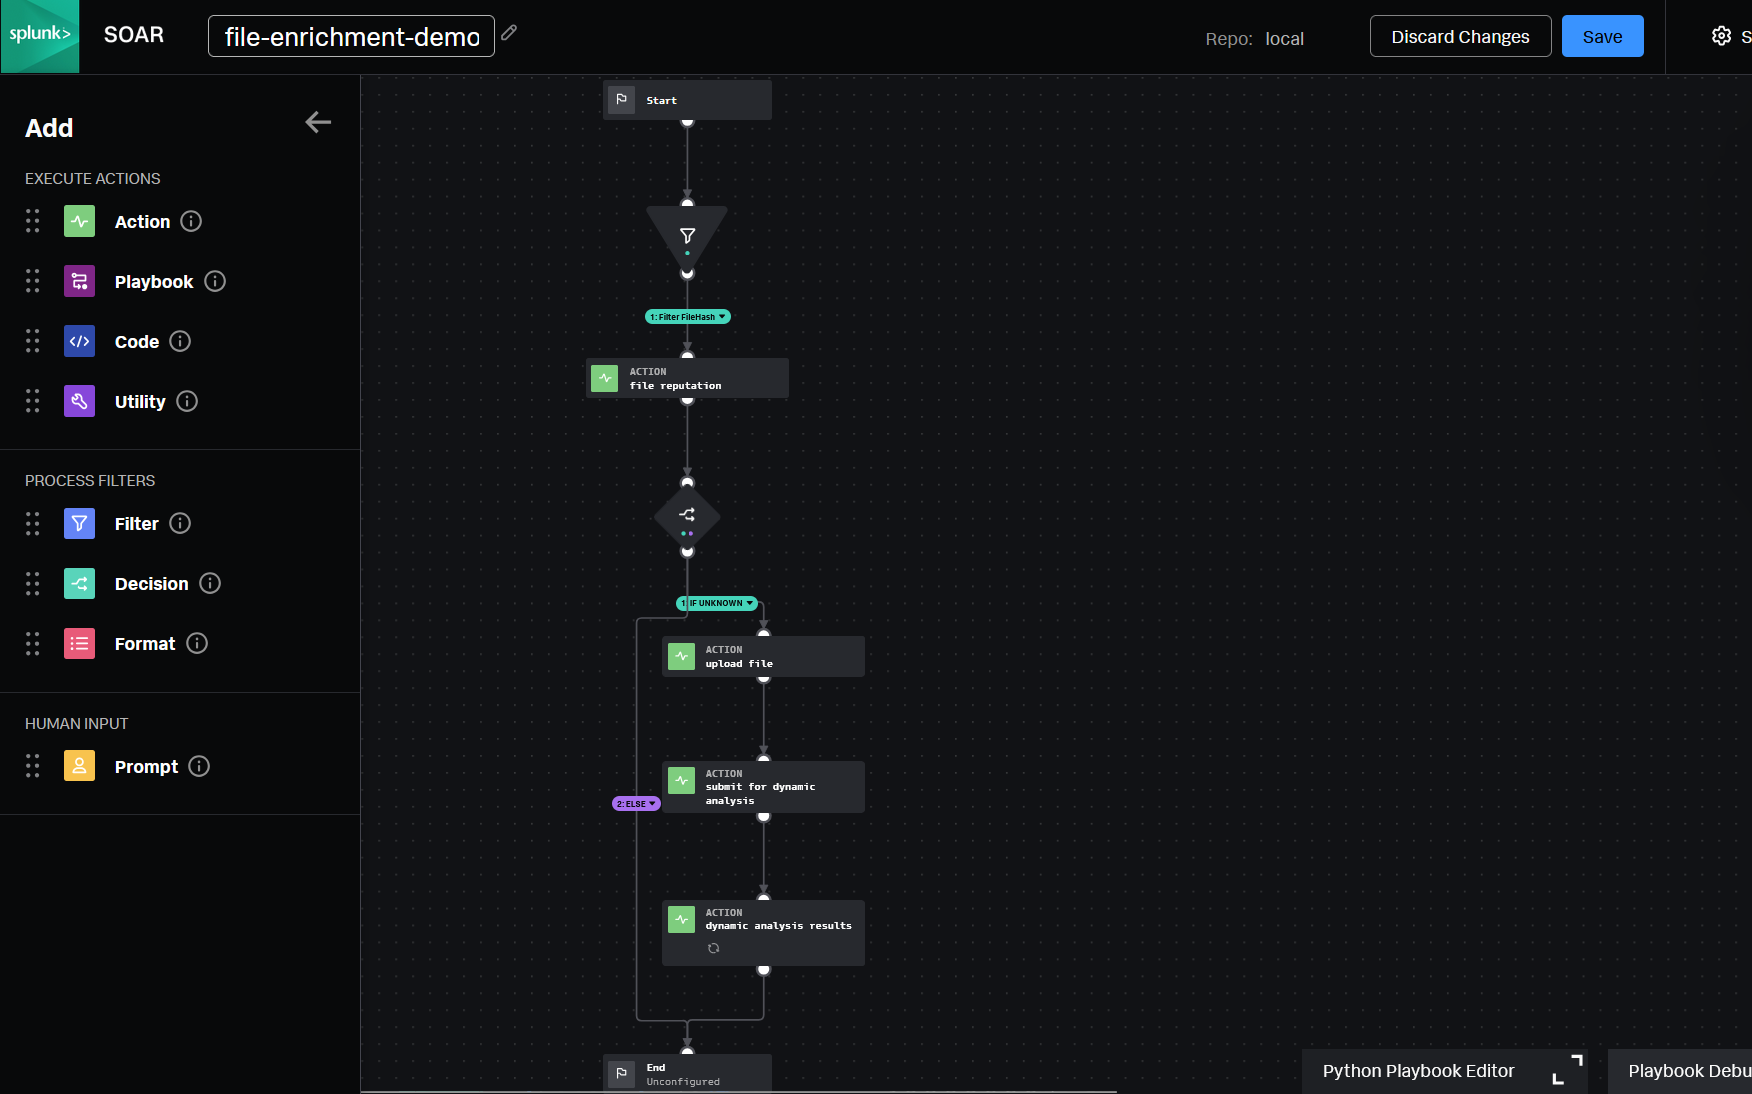
The finalized version of this playbook now looks like this:
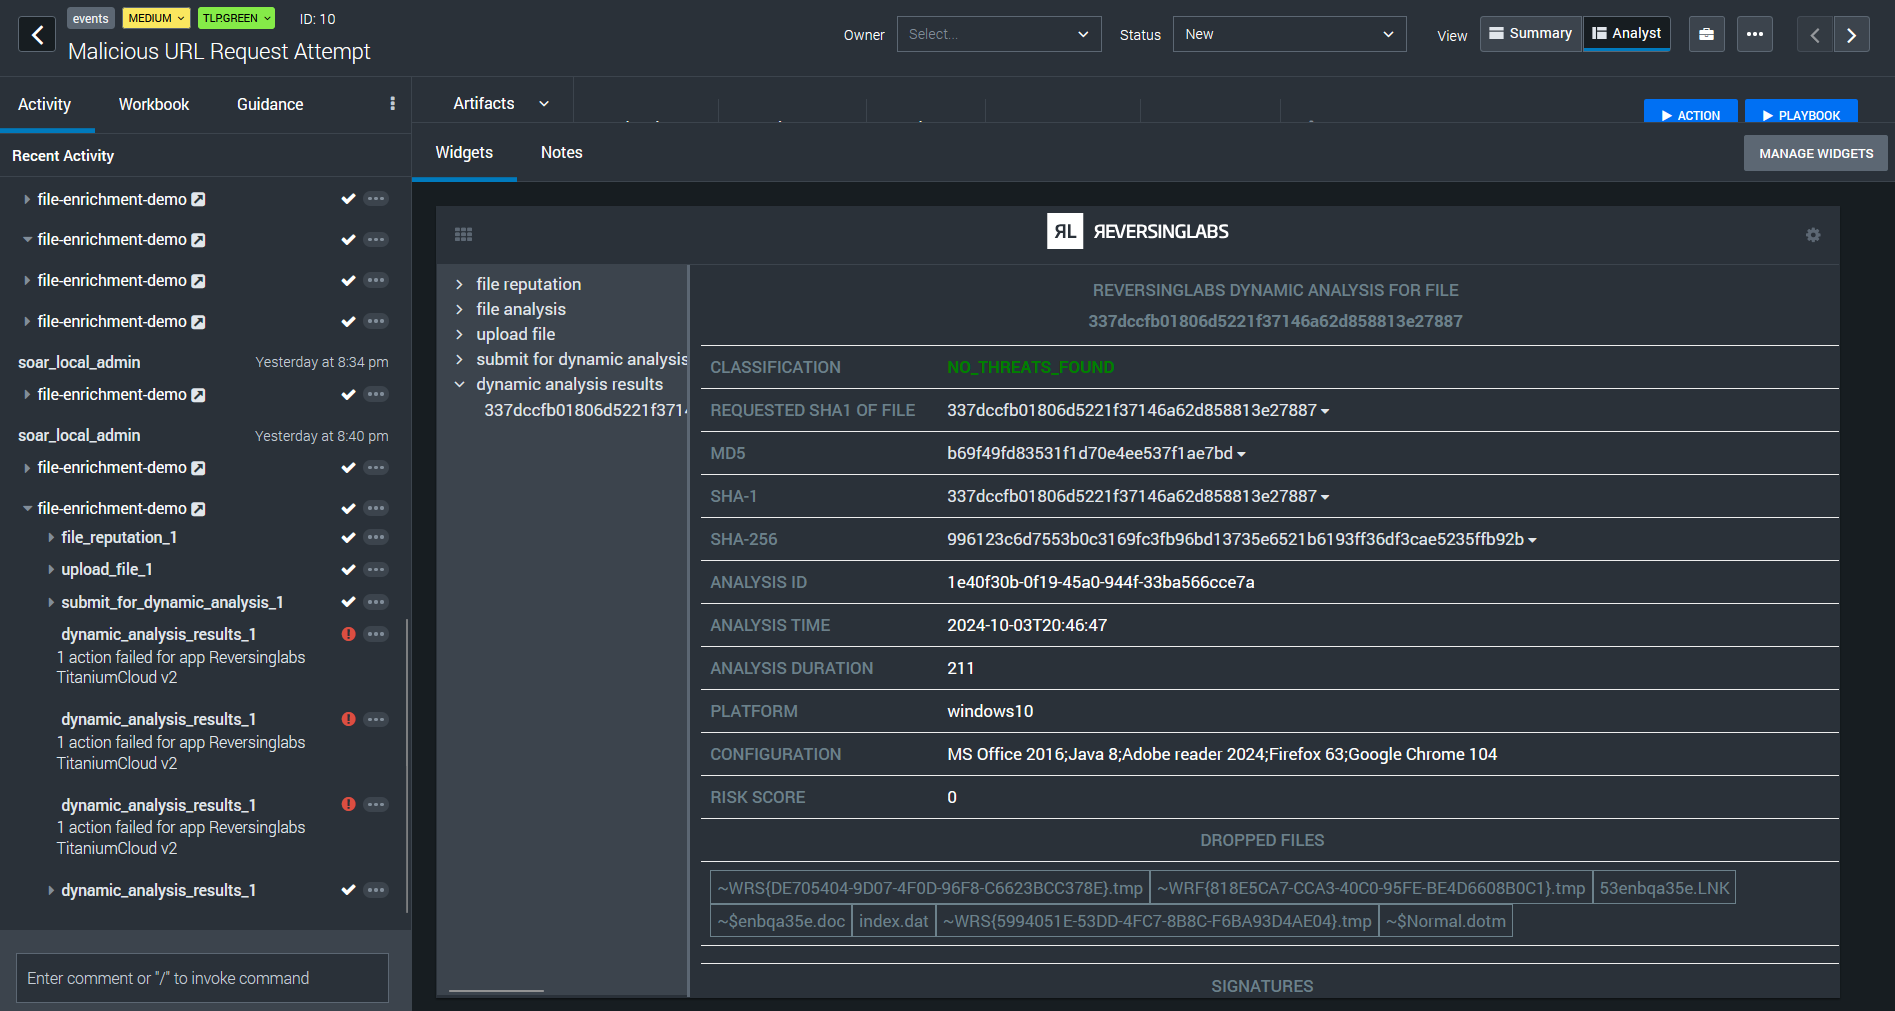
Once this playbook is set to run automatically, analysts will now have file enrichment information available to them in the widget view:
Conclusion
This blog post has outlined the process of creating a fundamental file artifact enrichment playbook in Splunk SOAR, leveraging ReversingLabs' capabilities. The key steps covered include:
- Implementing filters to identify and isolate file hash artifacts
- Executing reputation lookups to assess potential threats
- Initiating file detonation for in-depth analysis when reputation data is unavailable
By incorporating these steps into your security operations, you can significantly enhance your SOC's initial triage process, providing analysts with crucial context for more informed decision-making. This approach not only streamlines workflows but also improves overall threat detection and response times.
The integration of ReversingLabs with Splunk SOAR offers a powerful combination for strengthening your organization's security posture. To explore the full potential of this integration and learn how to implement it in your environment, be sure to visit our website to see how we integrate with Splunk and other top security platforms.